Heroku does not provide static IP addresses by default, which can pose a challenge when trying to connect to services like MongoDB Atlas that require IP whitelisting for security. QuotaGuard Static provides a solution by routing traffic through a static IP, which can then be whitelisted in MongoDB Atlas, allowing for secure connections from the dynamic IPs of Heroku dynos.
For simplicity and ease of setup, many online tutorials suggest allowing connections from any IP address. This approach is not recommended for production environments due to security risks, as it can expose the database to unauthorized access. Always ensure that security best practices are followed by restricting access to trusted IP addresses.
This article outlines the steps for setting up a SOCKS proxy using QGTunnel to route traffic between a MongoDB Atlas database and a Heroku application. The process involves:
Downloading QGTunnel to your project.
Configuring tunnels for each MongoDB shard via the QuotaGuard dashboard.
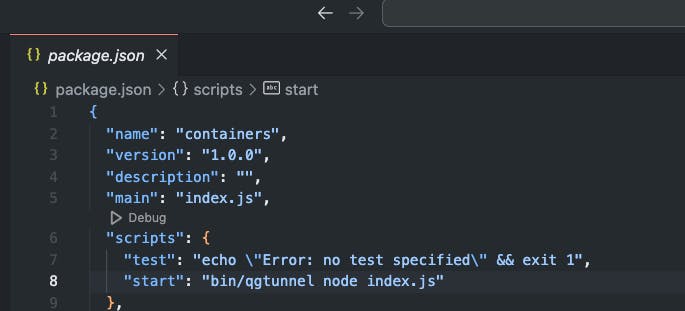
Changing your startup code to prepend with bin/qgtunnel.
Committing and pushing your code, ensuring the bin/qgtunnel and potentially the vendor/nss_wrapper/libnss_wrapper.so files are included in your repo.
Using environment variables to debug or alter the DNS mode if necessary.
Downloading your QGTunnel configuration from the dashboard to use locally in your project, preventing startup dependency on external services.
This process is designed to ensure that your database connections are routed through the static IPs provided by QuotaGuard. However, first, lets see what SOCKS proxy is. A SOCKS proxy is a type of proxy server that is used for general purposes, including handling internet traffic from a client requesting resources from other servers. SOCKS stands for "Socket Secure" and operates at a lower level than HTTP proxies, making it versatile and able to handle various types of traffic, not just web browsing. This means it can be used for more than just web pages; it can handle traffic for FTP, SMTP for email, and even torrents.
There are two versions of SOCKS, SOCKS4 and SOCKS5, with SOCKS5 being the more advanced version. The differences between them include:
SOCKS4: Supports TCP connections and can forward TCP packets over a proxy server. It doesn't support authentication, which means it doesn't require a username and password to connect to the proxy server.
SOCKS5: In addition to what SOCKS4 offers, SOCKS5 also supports UDP proxies and authentication. This makes it more secure and versatile, as it can handle a broader range of network protocols and offers methods to keep connections secure.
One of the main advantages of using a SOCKS proxy is its ability to handle any type of traffic, regardless of protocol, making it highly flexible. Additionally, because it operates at a lower level, it can provide a more seamless experience, with fewer errors and issues compared to higher-level proxies like HTTP proxies. It can be more complex to set up and doesn't inherently encrypt traffic, however, in our case mongodb atlas encrypts the connection and no addition measures like SSL/TLS or VPNs for sensitive data is required.
lets start by installing the plugin:
heroku addons:create quotaguardstatic:starter -a your-app-name
Once the addon is installed, you can visit your QuotaGuard dashboard like so:
heroku addons:open quotaguardstatic
Before setting up the connection for Mongodb+Srv, let's test our proxy setup using curl. Connection test is found in your quotaguard dashboard and it looks something like this:

curl -x http://username:password@us-east-static-02.quotaguard.com:9293 -L ip.quotaguard.com
You can alternatively test the connection on Heroku directly:
heroku run 'curl -x http://username:password@us-east-static-02.quotaguard.com:9293 -L ip.quotaguard.com'
Mongodb+Srv URL
"If you are connecting with a mongodb+srv URL (eg: mongodb+srv://USERNAME:PASSWORD@cluster0.abc123.mongodb.net/DATABASE?option1=value1) then you can lookup your cluster's shards here (https://www.whatsmydns.net/dns-lookup/srv-records). Be sure to prepend your cluster address with *mongodb.*tcp (eg: *mongodb.*tcp.cluster0.abc123.mongodb.net). This will produce the hostnames of your shards (eg: cluster0-shard-00-00.abc123.mongodb.net, cluster0-shard-00-01.abc123.mongodb.net, cluster0-shard-00-02.abc123.mongodb.net). You will then need to create a tunnel for each shard." -- QuotaGuard Docs
Lets decipher the above instructions together. You have a connection string to your mongodb atlas, it looks something like this:

this is the portion that we're interested in
mongodb.tcp.cluster0.erpdc.mongodb.net

Example Remote Destinations:
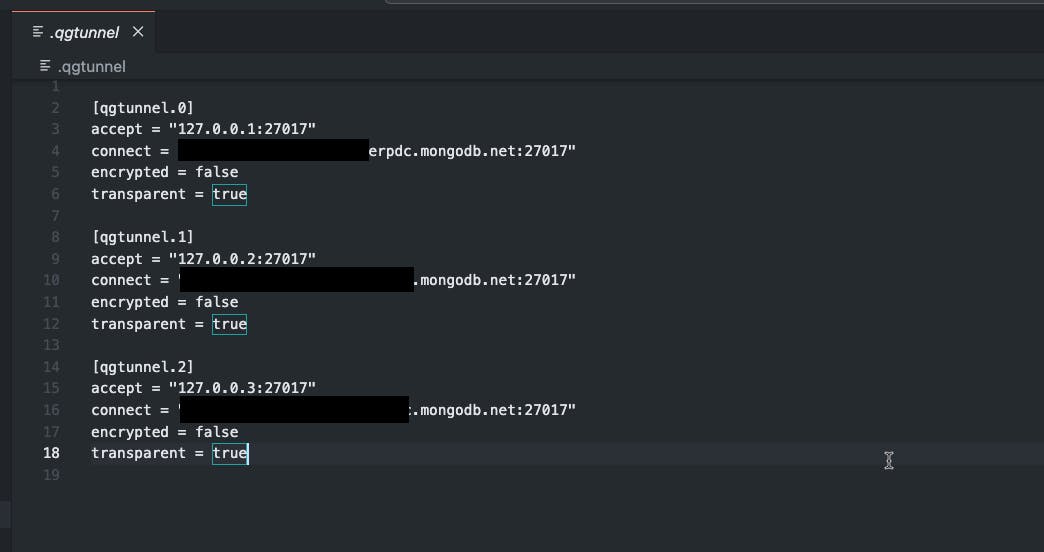
* tcp://cluster0-shard-00-00.abc123.mongodb.net:27017
* tcp://cluster0-shard-00-01.abc123.mongodb.net:27017
* tcp://cluster0-shard-00-02.abc123.mongodb.net:27017
Local Port: 27017
Transparent: true
Encrypted: false
This setup assumes that the remote mongodb server is listening on port 27017. This is usually the default port. Transparent mode allows QGTunnel to override the DNS for cluster0-shard-00-0X.abc123.mongodb.net to localhost, which redirects traffic to the QGTunnel software.

This is how my Procfile looks like.

And if here's my package.json file

Encrypted mode can be used to encrypt data end-to-end, but if your protocol is already encrypted then you don't need to spend time setting it up. MongoDB Atlas is already encrypting the connection so you don't need to implement additional encryption.
You have to introduce your socks file creds as an environment variable on Heroku like so

You have probably noticed that I have turned on QGTUNNEL_DEBUG on, this is so I can get a meaningful error message if the connection doesn't work.

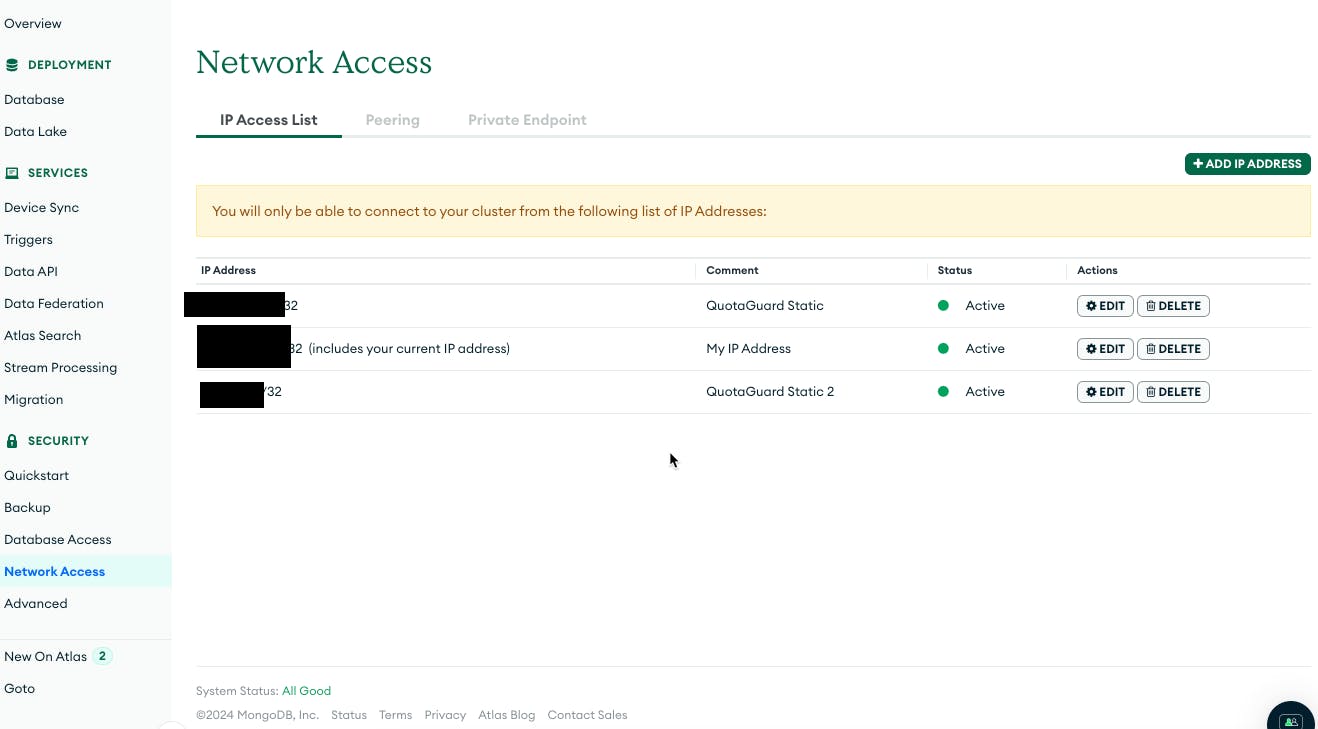
Then you have to log onto your MongoDB Atlas portal and whitelist the ip addresses.


